Tutorial:
Example tutorial to be written in Markdown
- Exercise files are found here
Intro
The ## indicates a top-level heading. Headings with a single # would
be used for dividing a file into completely separate sections. Probably
not what you would want. Start with an introduction and explain here
what the tutorial is all about.
Writing Equations
Note that subheadings use more than three # characters and
sub-sub-headings can use four.
Note that equations can generated with MathJax (TeX formatting).
“In-line” equations, such as: Er\({}_2\)Ge\({}_2\)O\({}_{7.5}\) or \(Er_2Ge_2O_{7.5}\) or \(P 4_1 2_1 2\). Note that by default MathJax
uses an italic font for letters and not numbers, but that can
be overridden, like this \(\textrm{Er}_2\textrm{Ge}_2\textrm{O}_{7.5}\)
or \(\rm Er_2Ge_2O_{7.5}\). Here is
another in-line equation: \(d(u,v) = 1 -
\frac{ u \cdot v }{ \sqrt{ u^2 v^2 } }\). Note the difference to
a display equation, as below. In-line equation delimiters are a single
dollar sign ($).
Display Equations
Or, write display equations, such as \[
d(u,v) = 1 - \frac{ ( u - \bar{u} ) \cdot ( v - \bar{v} ) }{ \sqrt{ ( u
- \bar{u} )^2 ( v - \bar{v} )^2}} \] which appear on a line by
themselves, use with double-dollar sign delimiters ($$).
Commonly-used Equations
- Use
20$^\circ$ for 20\(^\circ\).
- Use
LaB$_6$ for LaB\(_6\)
- Use
$2\theta$ for \(2\theta\)
- Also
$\sigma^2$, $\Gamma$,
K$\alpha_1$ and K$\alpha_2$ for \(\sigma^2\), \(\Gamma\), K\(\alpha_1\) and K\(\alpha_2\)
Formatting text
A blank line indicates the start of a paragraph. Multiple blank lines
are ignored. Lists can start with a “*” for a bullet or a number and a
period (such as “0.”) to indicate numbering. Use 4 spaces of indentation
to indicated a nested list.
- numbered list item 1
- numbered list item 2
Format text between a single pair of asterisks for italic
(like this *italic*) and doubled stars
bold (like this **bold**).
Text that should be displayed verbatim (without interpretation) can
be placed between two “backtick” quotes (`). So here
$A = a x^2 +b x + c$ is not interpreted as an equation. For
a block of text that spans multiple lines, begin the block with three
“back tick” quotes (```) alone on the line and end the block with the
same.
Links
To provide a link to a location within the tutorial, define an anchor
in HTML. Place this just before the location to be referenced. Here is
the HTML code to define an anchor “myanchor”:
<a name=myanchor></a>
To place a link to the anchor use a command to reference to that
location, with a MarkDown command like this:
here is some text [with a link](#myanchor) provided
Likewise for an external reference, replace “#myanchor” with a URL
(beginning with http:).
Here is some text with a link provided to the
Intro section and here is an external link: GitHub
ticket.
Tables
Tables can be created using pipe characters (|) and dashes (-). Note
that a colon can be used for right or left alignment or use two, as
below for centering.
     |  `FontSize_incr`  | Example |
     | :---: | ------------------------------------- |
     | 0 | [see file `font0.png`](imgs/font0.png) |
     | 3 | [see file `font3.png`](imgs/font3.png) |
The code above creates the table below.
See the markdown docs for other mechanisms to create tables.
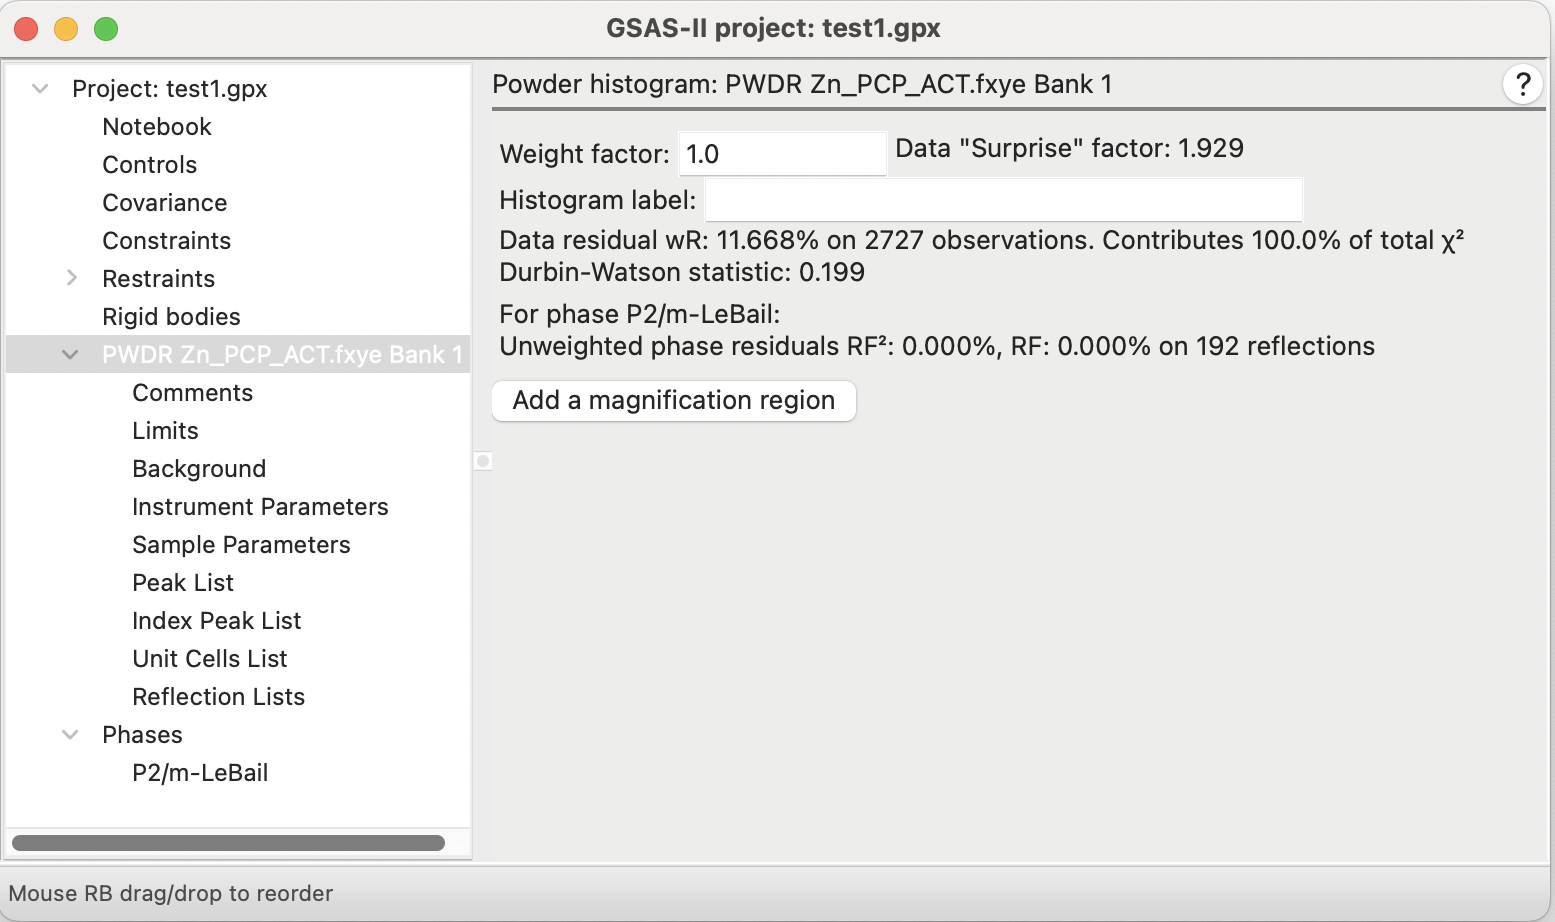
There are multiple ways to place figures into a tutorial. The
simplest way is to use the standard MarkDown command:
where the text between the square brackets ([]) is a
caption for the figure. Note the similarity of this instruction with the
command for creating links, except that an explanation mark
(!) is placed at the beginning. Place the figure before the
text that will discuss the figure. The .css file used with tutorials
places figures created with this command at the right margin. Leave a
blank line after this command or the figure is placed into a paragraph –
probably not what you want, except perhaps with a very small figure.
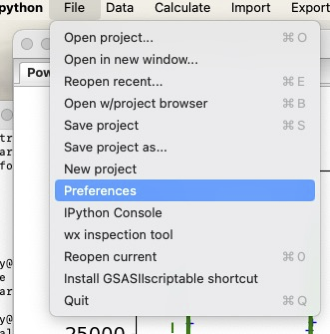
Alternately one can use HTML commands to place an image at a
particular place with an HTML command like this:
<BR clear=all>
<img src="./imgs/menu1.png" alt="extra peaks" width="200px;">
The BR command forces the image into a
new area of the page and may not be what you want with a complex image
layout.
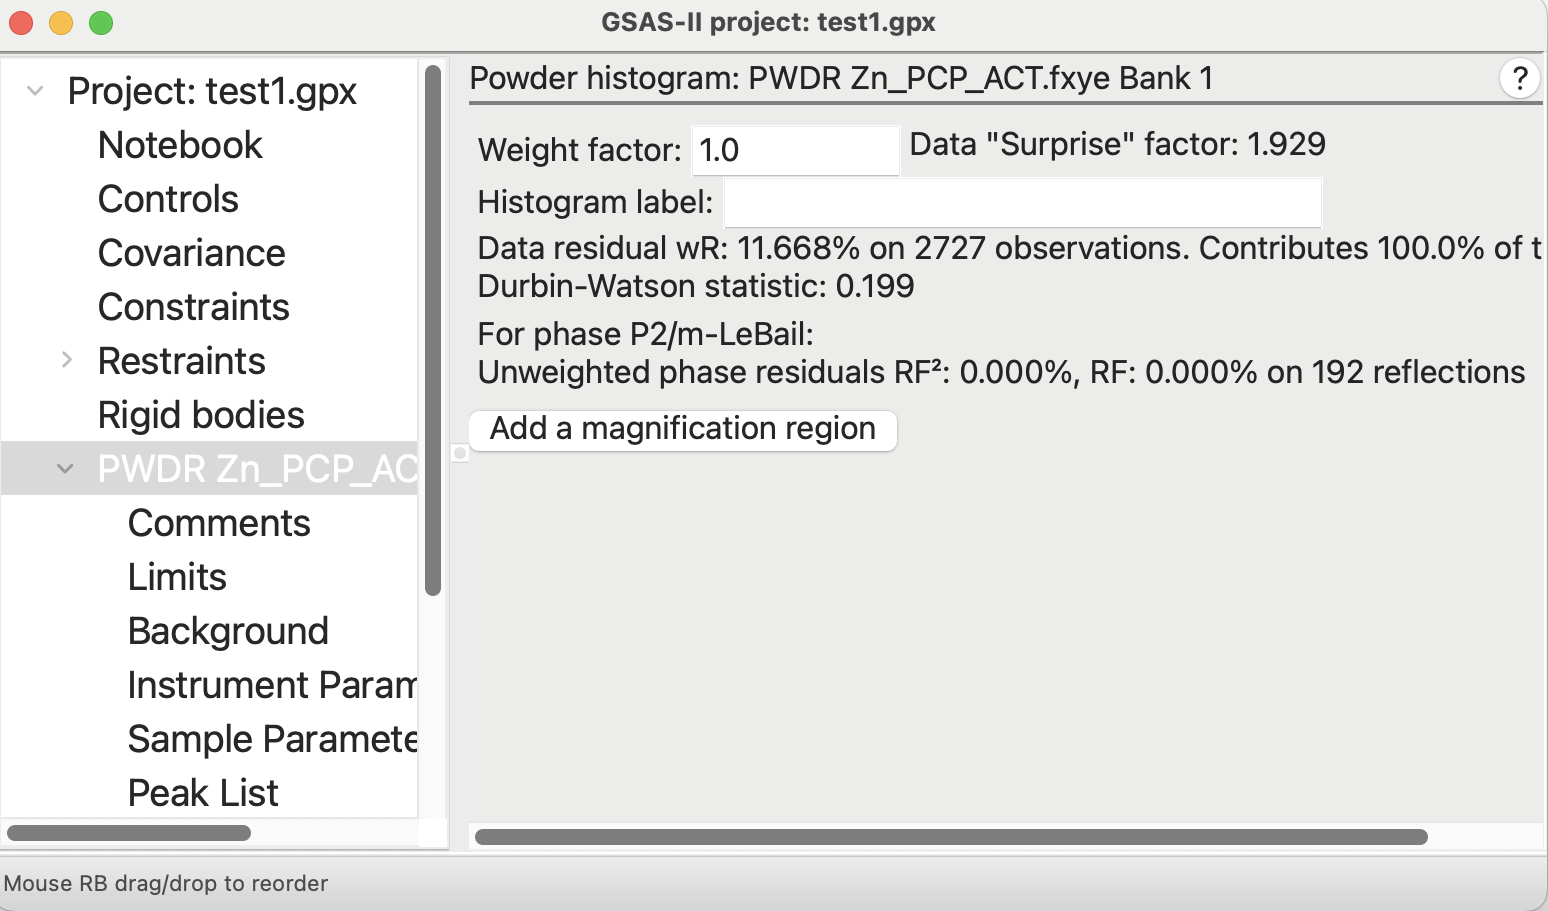
 The main advantage of the HTML command is that it allows one to rescale
an image by specifying options such as
The main advantage of the HTML command is that it allows one to rescale
an image by specifying options such as width and/or
height. Other options that may be of use are
align, (align options are top, bottom, center, left,
right), title (creates a tool-tip) and
border=2px (for a 2 pixel black border around the image).
Also, with an HTML command one can control how text is wrapped around an
image. As an example, here is code that can be used to embed a figure
into a paragraph:
<img src="./imgs/menu1.png" alt="extra peaks" width=200px
height=100px align="left" align="top" border=2px
title="distorted image">
Use of the HTML command <BR clear=all> will make
sure a that a block of text is placed at the margin when that is
desired. It is not necessary to insert this before section headings;
this will be done automatically.
Recommended
End the document with a table with the date and author(s). Here is
the code to do that:
     ----
     | |
     | ---: |
     | Brian Toby |
     | August 1, 2025 |
| Brian Toby |
| August 1, 2025 |